
|
Silongies, You Ask?
Making silicone coated sponge tires!
By Larry Shephard
![]()
| Silongies you ask? Silicone coated sponge tires or spongilies. whatever. I did this type of tire back in the middle 60’s. And again in the late 80’s for a short time. They worked well for a time in the 60’s till the super sticky sponge tires became the standard fare and I stopped making the silicone sponge tires as I got tired of keeping up, doing them, only by myself locally. And the new sponge tires were at that time quicker and cheaper. Cars were quicker and in 1/24th scale the coated tires could not keep up. But now in 1/32nd scale with our lower power motors and smaller tracks, such as at home or small 4-6 lane commercial tracks they seem to work well again, such as at the Marconi proxy. So for those who would like to try making you own, here is a quick article on how I make them for my own use.
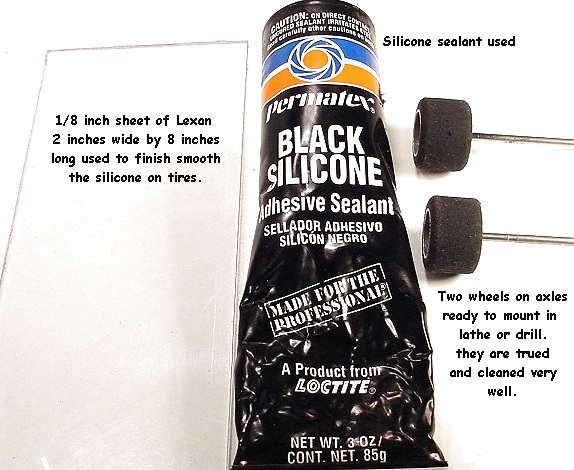
I use them mainly to make wider tires than are available other than by special order from the silicone tire makers. I like as wide a tire as I can get to suit my needs. I use old worn down sponge tires with the big and full hubs such as made by JK, HTK, Or Alpha on my 1/24th cars. This gives me at least a .450 inside diameter for inserts. I like them worn down to about .750 for rears or trimmed down to that size. adjust for your needs by trimming. I make them about .030-040 smaller than the desired finished size. That allows about a .030-.040 coat of silicone. I have found this brand of silicone to work the best so far. Permatex black silicone sealant available in 3oz tubes at the local auto parts store.
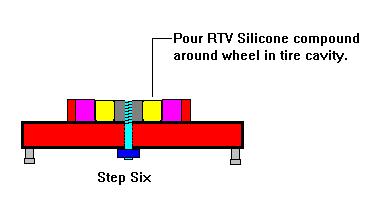
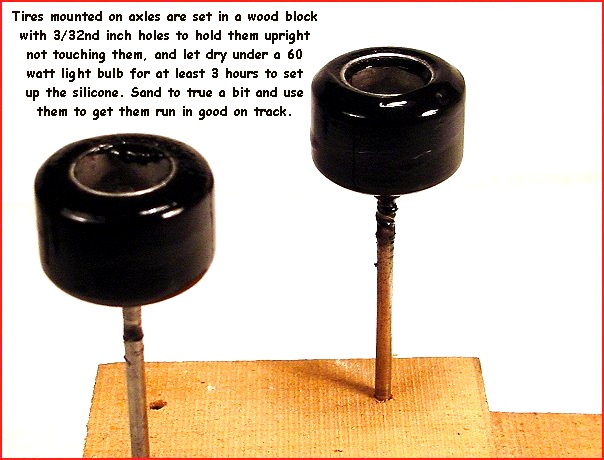
Mount them on a spare axle near the end so you can easily grip them by the axle with out touching the tire. Mount the tire and axle in a lathe chuck or use a small drill press or hand held drill motor, held in a vise to have control, of how they get worked on. Make sure the motor does not spin them too fast or you will not get the silicone to stick and get some thrown off in your face, (messy). Once mounted in the chuck, open the tube of silicone, and with a clean dry finger apply a 1/4 inch long ribbon of the silicone as it comes out of the tube to your finger and then rub it in vigourosly into the tire surface working the first coat in firmly to get seated it into the tire surface completely. It will take at least 3 to 4 applications of the same size amount of silicone to coat the tire well enough to build up a coating of at least .030 -040 to come to the desired diameter of the tire.
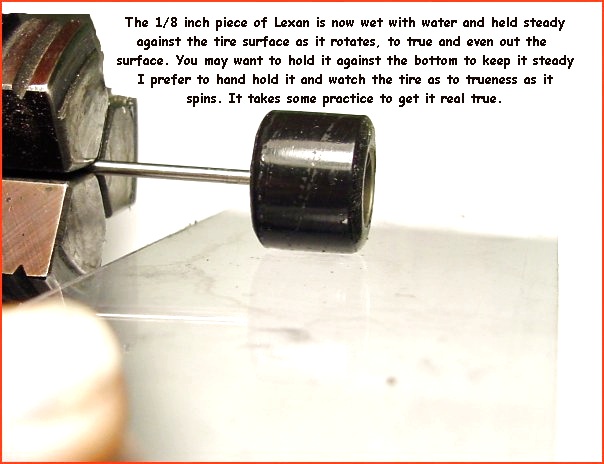
The spit or water will keep it from sticking to your finger, so it can move the silicone around where you want it. When it looks good to you. Stop and get out a smooth flat surface such as the recommended, Lexan sheet, 1/8 inch thick by at least 6-8 inches long. A piece of glass or a mirror will work as well. The sheet is then wet with water or (spit) and applied to the tire surface either by bracing the bottom side against the nearest hard surface, or as I prefer just hand hold it against the tire surface and lightly press against the tire to make a good true flat surface. If your press too hard, you will run the silicone over the edge too far and have to work it back to the center again. This will take some practice to get it the way it looks best. If you get a sharp edge, wet your finger again and work the sharp edge back to the middle and use the sheet again to flatten and true again.
by Larry Shephard |

![]()