

|
A Cheetah on Steroids
by Larry Shephard
UPDATE: This conversion would work the same on the new “Falcon” or “Hawk” motors. – OWH
What’s a Cheetah on steroids? Well it is usually a Pla-Fit Cheetah or Fox motor that has died or slowed down from what it normally ran. They are a cheap motor that performs well but has a definite life span when the cheapy brushes inside wear out. So what to do, Junk it? Nay my friends, save the can and magnets for the basis of this how to article. I know most of you don’t have a lathe so this will not interest you, but I have had requests for a how to do this so here goes. Maybe someone wants to go into production.
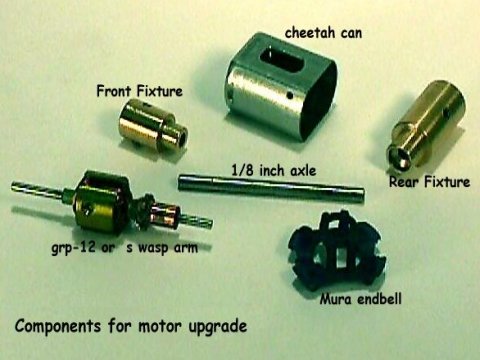
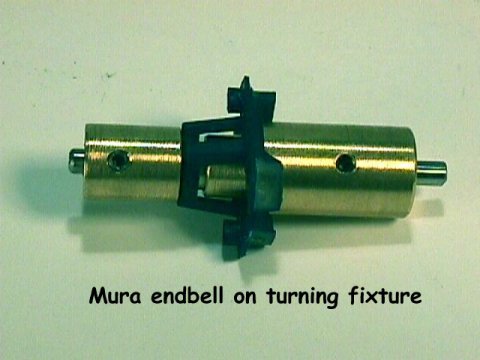
We are going to scrap the Cheetah armature and the endplate that serves as a brush mount on the stock motor. All we want is the can and the magnets. Use an old Mura endbell or a new one, your preference. We need to make the Mura endbell fit the end of the Cheetah can. We will make a fixture or mandrel to mount the endbell on so it can be turned down in a lathe. Refer to the following drawing to see the basic dimensions for the brass two piece fixture.
You will also need a 1/8 inch axle for a centering shaft. Use the lathe to make the fixture out of .500 brass round stock. The endbell must be mounted firmly so it cannot slip while turning and it must be located accurately so when turned and fitted to the can it will center the new arm so as not to drag on the magnets. The front part of the fixture will insert into the mura endbell front thru the bearing hole which has had the bearing removed temporarily. this centers the front of the endbell accurately. The rear part of the fixture inserts in the backside of the Mura endbell and locates in the molded rear cavity of the endbell. This serves to center the endbell fore and aft.
The 1/8 inch axle now inserts thru both front and rear fixture pieces and centers both and allows the pieces to be locked to the axle by the set screws drilled in the fixture pieces. Tighten the front set screw first to the shaft leaving at least 1/4 inch of the shaft protruding. Then push the rear piece into the endbell tightly and then tighten the rear set screw this should also leave at least 1/4inch of the axle showing at both ends, Size the axle to suit. this provides additional pressure to keep the endbell from spinning while being turned. The fixture pieces locating the endbell must be a tight fit to prevent the endbell from spinning around loosely.
The assembled fixture and endbell unit can be chucked in the lathe 3 jaw chuck or collet. Put the front side of the endbell in the lathe chuck. The rear end of the fixture and endbell should point toward the lathe tail stock. Mount a drill chuck in the tail stock and put a 1/8 inch axle bearing in the chuck jaws to insert the 1/8 inch axle into at the rear of the fixture. This will assure alignment of the endbell with the rotational center line of lathe. This means when turned, the endbell will be concentric with its own center line.
Refer to the following drawing for the dimensions critical to the endbell sizing. The finish size for the endbell diameter in the Pla-Fit can is shown as .755. The other sizes are the ones that the fixture uses for locating the endbell on the fixture. When turning the endbell use a sharp HSS turning tool that has had the very sharp edge of the tool broken and smoothed slightly by a hand stoning. Use about 400 rpm and only remove about .005 at a pass to prevent digging in to the plastic and spinning the endbell on the fixture. Use a micrometer or dial caliper to keep track of your measurements.
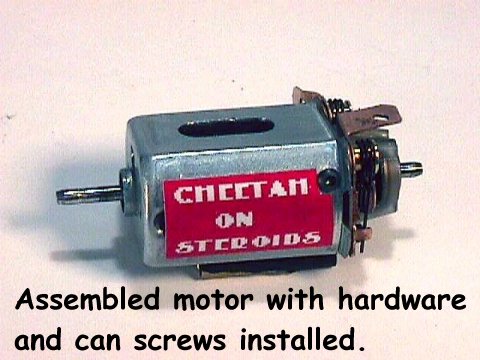
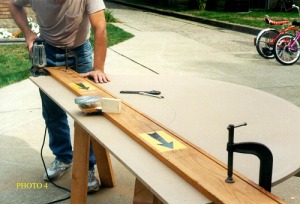
 When assembling the motor install the magnets into the can so that the arm will center between them length wise. Use some CYA to glue them in place but use sparingly. If the endbell already has can screw holes in it try to be careful lining them up when drilling the can for the screws. Use the small RJR button head type can screw. If drilling new holes in can and endbell try not to have the screws touch the endbell hardware mounting screws as they can short out. Align the brush hoods for good brush wear and contact, install your favorite brushes and springs. Space out the arm for a small amount of end play. Depending on the arm, you may have to trim the rear fixed spacer on the arm shaft to get more fore and aft clearance. The can can also be shortened up to .125 in length to help it fit in tighter spaces and to fit 1/32nd chassis better. These pictures should help.
Now have some fun with the fastest Cheetah in your neck of the woods.
by Larry Shephard
UPDATE: This conversion would work the same on the new “Falcon” or “Hawk” motors. – OWH
Related posts:
 Ninco Mercedes Upgrade Project
 Formula One/Indy Chassis Project
 Proxy Race II Prototype Car Building
 Silongies, You Ask? Making silicone coated sponge tires!
 The First Slot Car Big Mag “How To” – by Josh Bauer
 Building the J & L Raceway ~ Part 2 ~
 Building the J & L Raceway ~ Part 1 ~
 Silicone Tire Casting 101
 The Wheel of Fortuneless